Monday, July 30, 2012

ZING proudly presented by the food dept. We are enormously excited to publish this zingy, citrus post, straight from the orchard. We have had some lovely feedback from you, so this has inspired us to do a super big post with lots of different shots and lots more information as well.


Ruby grapefruit and kaffir lime-ade
Enjoy this on its own or add a splash of soda water and for your next party, use it to top up a glass of champagne.
Makes 6 cups

• 2 cups water
• 1 cup sugar
• 8 kaffir lime leaves, bruised
• finely grated zest, 2 kaffir limes
• 4 cups freshly squeezed ruby grapefruit juice (approximately 6 large ruby grapefruit)
• extra, 1 ruby grapefruit, sliced for garnish

1. Combine the water, sugar, kaffir lime leaves and zest in a medium saucepan. Stir over a low heat until the sugar has dissolved. Increase the heat and simmer for 5 minutes. Turn off the heat and transfer the syrup to a jug and allow to cool. Refrigerate until cold.
2. Combine the grapefruit juice and syrup in jug and chill until ready to serve.
3. Serve with extra slices of ruby grapefruit.


Linguine with prawns and lemon gremolata crumb
Being Australian, we love our seafood, but if you aren't so confident with cooking the delights of the sea, then have a crack at this easy pasta dish. It's a great way to introduce prawns (or shrimp) to your repertoire and makes a tasty mid week meal.
 Serves 2

• 1 tablespoon olive oil
• ½ cup panko breadcrumbs
• 1 cup continental parsley leaves, roughly chopped
• finely grated zest of 2 lemons
• ¼ teaspoon dried chilli flakes
• sea salt flakes, to taste
• black pepper, to taste
• 250g linguini
• 1 tablespoon olive oil
• extra, 1 tablespoon olive oil
• 1 clove garlic, crushed
• 500 g medium green prawns, peeled leaving tails on

1. Heat oil in a large frying pan and toast the panko crumbs over a medium heat until golden brown. When brown remove from the pan and place into a mixing bowl. Add the parsley, lemon rind, chilli flakes, salt and pepper and toss to combine, set aside.
2. Cook linguine in boiling water until al dente. When draining reserve a little (approximately ½ cup) of cooking liquid.
3. Heat extra oil in a large frying pan over a high heat and add the prawns and garlic and sauté until for 5 minutes until the prawns change colour and are cooked through.
4. Add the pasta to the prawns in the frying pan with a little splash of the pasta cooking liquid and toss to combine.
5. Arrange the pasta and prawns on a serving plate and sprinkle liberally with the gremolata crumb. Serve immediately.


Soft flour tortilla with bbq chipotle chicken and a lime and blackbean salsa
When the food dept and friends dine out, we like to order a mix of entrees, mains and desserts to share. It's so much fun to taste and talk about a wide selection from a menu, rather than one dish. So this recipe fits in well with our philosophy of sharing small plates of food. On the day we photographed "Zing", we sat at Sally's round table passing warm floury tortillas and small bowls of avocado, sour cream and salsa, rolling and eating these lovely tortillas. So grab some friends for lunch and share a bite and a laugh.
 Serves 4 - 6

• 1 small red onion, peeled leaving the root end
   attached and cut into quarters
• 2 cloves garlic, skin on
• 4 dried chipotle chillies
• 1 teaspoon cumin seeds
• 1 teaspoon sea salt flakes
• 2 tablespoons cider vinegar
• 4 chicken breast fillets
• 2 large bunches rosemary
• 1 tablespoon olive oil
• 1 quantity Warm flour tortillas
• 1 quantity Lime and black bean salsa
• 1 large avocado, flesh scooped out
• sour cream, for serving

1. Heat a dry griddle plate or heavy based frying pan over a low heat, place on the onion, garlic cloves and chipotle chillies and roast until each is nicely charred. 
2. Remove the skins from the garlic and combine with the onion, chilies, cumin seeds, salt and cider vinegar in a food processor, process until smooth. Store in a jar in the refrigerator, any remaining paste will keep for upto a month.
3. Slice chicken breasts fillets across the grain into 4-5 thick slices. Remove the leaves from the lower parts of the rosemary stalks and thread on the chicken. Combine 4 tablespoons of the chipotle paste with olive oil and rub onto the chicken skewers. Marinate in the refrigerator for 30 minutes.
4. Barbecue the chicken over a medium heat for 2-3 minutes on each side or until cooked through.
5. Serve chicken on a platter with Warm flour tortillas, Lime and black bean salsa, avocado and sour cream.

Lime and black bean salsa

• 1 x 440g can black beans, drained and rinsed
• 3 limes, peeled and segmented, reserve the membranes
• ½ cup coriander leaves, roughly chopped
• ½ small red onion, finely diced
• 1 small clove garlic, crushed
• 1 jalapeno chilli seeded and finely diced
• ½ teaspoon flaked sea salt
• ½ teaspoon sugar

1. Combine all of the ingredients, except for the lime membranes in a bowl, toss lightly. Squeeze the juice from the membranes over the salsa and use immediately.

food dept fact: Try adding some chargrilled corn to the salsa. Chargrill a peeled cob of corn until blackened, cut the corn from the cob and add to the salsa.


Soft flour tortillas
If you are stuck for time, instead of making these tortilla, you could buy some good quality tortilla.
Makes approximately 16

• 3 cups plain flour
• 1 teaspoon salt
• 2 teaspoon baking powder
• 80g butter, roughly chopped
• 1 cup warm water

1. Sift the flour salt and baking powder in a large bowl. 
2. Rub the butter into the flour until it resembles breadcrumbs. Carefully add the warm water a little at a time until it forms a soft dough. It may not take all of the water.
3. Turn the dough into the bench and give a light knead.  Break the dough into 50g balls and leave on a lightly floured bench. Cover with a tea towel and to stand for 15 minutes.
4. Heat a dry flat griddle plate or a heavy based frying pan over a medium heat. Take a ball of dough and flatten in your hands until approximately 10cm. Place into a tortilla press or roll out with a rolling pin to approximately 20cm.
5. Place onto the dry griddle plate and cook for approximately 30seconds or until small bubbles blister on the tortilla, turn it over and cook for another 30 seconds. Remove from the griddle and keep warm wrapped in a clean dry teatowel.

food dept fact: Make the tortillas ahead of time, and reheat by wrapping them in foil and placing in a low oven or take the foil off and give them a quick burst in the microwave.


Lemon and thyme salt        
Makes ½ cup

• ¼ cup sea salt flakes
• 1 tablespoon thyme leaves
• finely grated zest, 2 lemons

1. Preheat the oven to 150°C (300°F). Combine salt flakes, thyme and lemon together in a small bowl. Rub together lightly with your finger tips to combine.
2. Pour salt onto a lined baking tray. Turn off the oven and place the tray in the warm oven close the door and leave in the oven undisturbed for 4 hours or overnight.
3. Pour salt into a jar and store in a dark dry place. Use with 6 months for maximum flavor.

food dept fact: This is beautiful sprinkled over the skin of chicken before roasting of try it on barbecued fish.
• Short on time? We recently discovered the saltbox, they have a lovely lime fresco salt in their range. thesaltbox.com.au 


Baked whole snapper with lemon, oregano, olives and a lemon beurre noisette  
A whole fish can be quite intimidating to cook, the trick is to get your fishmonger to do the hard work of scaling and cleaning the fish. After that it is very easy to have your meal ready in 30 minutes
Serves 2

• 1 x 750g snapper, cleaned
• 1 large lemon, finely sliced
• ½ bunch oregano leaves
• 1 clove garlic, thinly sliced
• ½ cup kalamata olives
• olive oil, to drizzle
• 2 teaspoons Lemon thyme salt
• 50g butter
• juice ½ lemon
• 1 tablespoon salted capers, washed and drained

1. Preheat the oven to 190°C (375°F). Rinse the fish and dry with paper towel.  Score the flesh of the fish in several places on each side and place in to an ovenproof frying pan or baking dish.
2. Fill the cavity and slits of the fish with the lemon slices, oregano and garlic slices. Scatter over the olives, drizzle with olive oil and season with Lemon thyme salt.
3. Bake for 20 minutes or until fish is opaque when the flesh is flaked with a fork. If it is not cooked return to the oven and continue for another 5-10 minutes.
4. During the last 5 minutes of the fish cooking place the butter in a shallow frying pan over a medium heat and cook until the milk solids on the base of the pan have turned a golden brown color and the butter is foamy and smells nutty like “hazelnuts”. Once it gets to this stage immediately remove the pan from the heat and add the lemon juice and capers to prevent the butter form burning. 
5. Pour the lemon beurre noisette over the fish and serve with a fresh leaf salad of a selection of steamed greens.


the food dept’s orange marmalade
If you love marmalade, as many people do, you will adore this recipe, it makes enough for you give to friends and some to keep for yourself.
Makes approximately 9 cups

1 kg oranges
1½ cups sugar to every one cup or pulp.

1. Cut the oranges in half from top to bottom, then thinly slice across the orange halves. Place into a large bowl and pour over just enough water to cover. Stand overnight.
2. Place into a large shallow pot. The pan being more shallow allows for the liquid to evaporate more quickly.
3. Cook over a medium heat until the rind is tender, this may take between 15 and 30 minutes. The thickness of the peel and the thickness of the slices will vary the cooking time.
4. Measure the cooked orange pulp and return to the pan with the sugar, stir over a low heat until all of the sugar has dissolved.
5. Bring to the boil over a high heat, reduce the heat and simmer until the marmalade jells when tested. This could take anywhere from 1 - 2 hours. To test the marmalade, place a saucer into the freezer. Place a teaspoon of the cooking marmalade onto the cold saucer and allow it to cool, the marmalade should “jell” on the plate and not run when the saucer is tipped up. Be careful to not overcook or this will produce a dark syrupy marmalade
6. Allow the marmalade to mostly cool in the pan and then pour into sterilized jars. If the marmalade is put into the jar hot the pieces of rind will rise to the top. Allow to cool completely and the cover the jars with the lids. Store in a cool dark place and then refrigerate once opened.

food dept fact: See our preserved lemon recipe on out slow post for “how to sterilize jars and bottles”.


Orange marmalade and cream cheese tart
The inspiration here came from the French dessert "pithivier". As everyone in the food dept seemed unable to remember or pronounce the word, "pithivier", we gave up and David created this gorgeous tart instead. The silky smooth cream cheese custard with a crisp base, is wonderfully decadent and probably won't last long!
Makes 1 x 23cm tart

• 2 sheets puff pastry
• 250g cream cheese
¾ cup caster sugar
• 3 eggs
• 150ml double cream
• Juice and grated rind of 2 oranges
• ½ cup the food dept’s orange marmalade

1. Preheat oven to 200°C (400°F) To make the tart shell, place 2 squares of pastry together and roll out to 2mm (back to the thickness of 1 sheet of pastry).
2. Grease a 23cm loose bottomed tart pan and line with the pastry. Place into the refrigerator and rest for 2 hours. After the pastry has rested trim edges. Prick the base with a fork, this prevents the pastry from puffing up too much. Line with baking paper, fill with pie weights and bake for 25 minutes. Remove the pie weights and paper, and bake for a further 5–10 minutes or until the pastry is crisp and golden. Remove from the oven and reduce the oven to 160°C (325°F).
3. For the filling, whisk the cream cheese with the sugar until soft, stir in the eggs, cream, juice and rind from the orange until you have a smooth mix.
4. Spread the base of the tart with ½ of the marmalade (3 tablespoons) then pour
in the orange filling. Bake for 40-45mins or until just set. Remove from the
oven and allow to cool.
5. For the glaze, heat up the remaining marmalade with 2 tablespoons of boiling water. Spoon over the top of the tart and serve.


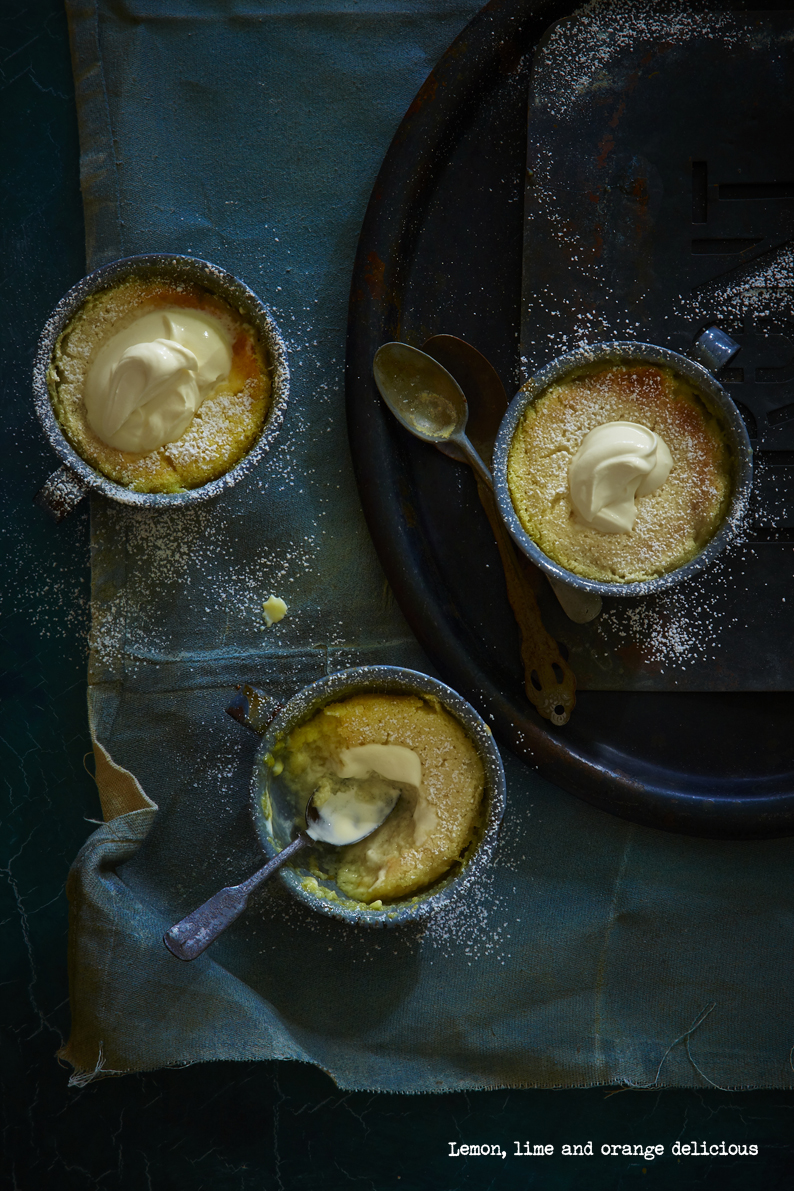
 Lemon, lime and orange delicious 
We couldn't do a citrus story without a lemon delicious, so we have added a little twist by making it sharper with a hint lime and sweeter with some orange.
Serves 6

• 80g butter
• ½ cup caster sugar
• 3 eggs, separated
• juice and rind of 1 lemon
• rind only of 1 lime
• juice and rind of 1 orange
• ¼ cup self raising flour
• 1½ cups milk
• extra ½ cup cater sugar

1. Preheat the oven to 180°C (360°F). Grease 6 x 1 cup oven proof ramekins.
2. Using and electric mixer cream the butter, sugar for 2 minutes. Add the egg yolks one at a time then mix through the zest. Mix through the flour, milk and juices.
3. Whisk the egg whites until soft peak then gradually add the extra caster sugar and beat until the sugar has dissolved. Gently fold half of the egg whites and sugar into the mixture, then gently fold through the remaining egg whites and sugar.
4. Pour into ramekins and them bake for 15 - 20 minutes. Serve immediately with double cream.


 Campari and orange
These 2 refreshing drinks are traditionally served with orange slices but why not try some other citrus fruits, maybe make it a Campari and grapefruit juice or liven up a Aperol Spritz with lime!

• 1 part Campari
• 2 parts freshly squeezed orange juice
• ice cubes
• a slice of orange

1. Place the Campari in a tumbler, top with orange juice, ice cubes and a slice of orange.

 Aperol spritz

• 3 parts Proseco
• 2 parts Aperol
• a splash of soda
• ice cubes
• a slice of orange

1. Place the Proseco and Aperol into a tumbler, top with a splash of soda, ice cubes and a slice of orange.


the food dept. would like to thank Campari Australia for generously supplying the alcohol for this shoot.
We would also like to thank our food assistant, Caroline Ryan for whipping up a storm in the kitchen.

Saturday, July 21, 2012

SLOW EXTRA II – What is sweet, salty and slow to make?

::::::::::::::::::::::::::::::::::::::::::::::::::::::::::::::::::::::::::::::::::::::::::::::::::::::::::::::::::::::::::::::::::::::::::::::::::::::::::::::::::::::::::::::::::::::::::::::::::::::::::::::::::::::::::::::::::::::::::::::::::
Salted cardamom dulce de leche
Dulce de leche literally means candy made of milk and is said to have originated from Argentina. Our version is sweet, soft, salty and with a crunchy crisp biscuit, this little dessert has it all. Mix it up and try your favourite of biscuit instead of a waffle.
Makes 1 cup

• 1 x 395g can sweetened condensed milk
• ½ teaspoon salt flakes
• ½ teaspoon ground cardamom
• small waffle biscuits and hot milk to serve

1. Preheat oven to 200°C (400°F). Pour sweetened condensed milk into a baking dish, 28 x 18 x 4cm and sprinkle over the salt flakes and ground cardamom, stir through.
2. Cover the baking dish tightly with foil and place into a larger baking dish.  Pour in enough water to come ¾ of the way up the side of the smaller pan to create a bain-marie.
3. Bake in the oven for 1 ¾ hours or until the sweetened condensed milk is golden brown in colour. Top up the water in the bain-marie every ½ an hour or as the water evaporates.
4. Whisk the dulce de leche until smooth and store in a jar in the refrigerator for up to one month. Spread between waffle biscuits and serve with warm milk as a perfect midnight snack.

food dept. tricks: Smear a couple of tablespoons in a tall glass and top with milk and scoop of vanilla ice cream for a delicious caramel shake.
• Use this recipe anywhere you would use caramel – tart fillings, cake fillings, on waffles or pancakes or simply over ice cream.


Thursday, July 12, 2012

SLOW EXTRA – Preserved lemons are really just slices of a perfect golden summer bottled in a jar. Add a little citrus zing to your cooking and enjoy summer throughout the year.


::::::::::::::::::::::::::::::::::::::::::::::::::::::::::::::::::::::::::::::::::::::::::::::::::::::::::::::::::::::::::::::::::::::::::::::::::::::::::::::::::::::::::::::::::::::::::::::::::::::::::::::::::::::::::::::::::::::::::::::::::
Preserved lemons
Makes a 1 litre jar
Zesty, citrus preserved lemons in jars create such a welcome bright light in any kitchen. They are great in North African, Mediterranean and Middle Eastern dishes, and work well wherever fresh lemons do — with fish, white meats such as chicken and rabbit. Once opened, keep a jar of your own preserved lemons in the fridge to give an instant zing to salads, or finely dice it into paellas, tagines, cous cous and rice. 

• 4 large lemons washed and cut into 6 wedges
• 1 cup cooking salt
• 1 cinnamon stick
• 10 peppercorns
• 2 bay leaves
• 4 cardamom pods

1. Preheat oven to 180°C (360°F). Wash a 1 litre jar in hot soapy water and rinse well. Place onto a tray and dry the jar in the oven for approximately 10 minutes. This will sterilize the jar.
2. Place the lemon wedges and salt into a large non-reactive bowl. Massage the salt into the lemon, squeezing the juice out of the flesh of the lemons.
3. Arrange the lemon wedges in the cooled jar with the skin of the lemons facing out. Arrange the cinnamon stick, peppercorns, bay leaves and cardamom pods as you go.  Pack down tightly.
4. Pour the lemon juice and salt from the bowl into the jar, ensuring the lemon pieces are well covered. Seal the jar with a non-reactive lid and leave at room temperature for one day. Turn the jar to disburse the salt and juice through the lemon then leave to cure in the refrigerator for 1 month before use. They will keep for up to 12 months.

food dept. facts: To use preserved lemon, cut away pith and flesh leaving the rind. Wash the rind and use as required. If the rind seems a little salty for your taste, allow it to soak in water for 10 minutes, drain and use.
• Create your own signature blend by mixing up the herbs and spices, try adding rosemary or add some heat with a chilli and coriander combination.
quick trick: To make a jar of marinated olives – cut preserved lemon rind into julienne and toss with kalamata olives, sliced garlic, continental parsley leaves and cover with olive oil.
 

Wednesday, June 27, 2012

SLOW COOKING fever hits the food dept. It's winter here and the kitchen is the place to be. So cook up some gorgeous slow roasted lamb or maybe follow the hot new trend and do a pork slider.


A big thank you to our friends at Dinosaur designs who lent us these lovely white and black platters from their Earth collection, they are called Earth Art Range Medium Temple plate and you can find them on the dinosaur design website!


::::::::::::::::::::::::::::::::::::::::::::::::::::::::::::::::::::::::::::::::::::::::::::::::::::::::::::::::::::::::::::::::::::::::::::::::::::::::::::::::::::::::::::::::::::::::::::::::::::::::::::::::::
Vietnamese pulled pork sliders with Asian slaw
Makes 24 sliders
Roasted meat sliders are the hot new food trend to pop up in café's and truckstops all over Sydney, could this be a worldwide trend? Our version is like a mini pork roast in a sweet soft roll, so serve up these cute little sliders at your next party.


• 1 onion, roughly diced
• 1 x 2kg skinless pork shoulder
• 1 stalk lemon grass, bruised
• 2 cloves garlic, crushed
• 2 tablespoons grated ginger
• ½ cup char siu sauce
• ½ cup rice vinegar
• 1 tablespoon fish sauce
• 1 tablespoon soy sauce
• 2 tablespoons sugar
• 24 small brioche buns or small bread rolls
• extra, char siu, for serving
1 quantity Asian slaw

1. Sprinkle the onion over the base of a slow cooker and place the piece of pork on top. If the pork is too large for your cooker it can be cut in half. Add the lemon grass.
2. In a jug, combine the garlic, ginger, char sui sauce, vinegar, fish sauce, soy sauce and sugar, stir to combine, pour over the pork and cover the slow cooker.
3. Turn the slow cooker onto low and cook for 8 hours. When cooked the pork should just fall off the bone. Place onto a large tray that will collect the juices and gently tease and pull the meat apart with your fingers or 2 forks. Before returning the pork to the juices, skim any excess fat. Return the pork to the slow cooker and toss through the pan juices. Cover and keep warm.
4. Slice open buns and lightly toast, top with a spoonful of the pulled pork mixture. Drizzle with a small amount of char siu sauce if desired and spoon on some Asian slaw. Serve immediately.

food dept fact: If you don’t have a slow cooker, place pork into a baking dish and cover tightly with foil, bake in a low oven 110°C (225°F) for 8 hours. Extra pulled pork and can be frozen in its juices for up 3 months.

Asian slaw 

• 2 cups finely shredded wombok cabbage
• 1 small carrot, peeled and shredded or finely grated
• 6 snow peas, trimmed and thinly sliced on the diagonal
• ½ cup coriander leaves
• ½ cup mint leaves
• 2 green shallots, thinly sliced on the diagonal
• ¼ cup rice vinegar
• 2 tablespoons caster sugar
• 2 tablespoons fish sauce
• 1 clove garlic, finely chopped
• 1 small red chilli, seeded and finely diced

1. In a large mixing bowl toss together cabbage, carrot, snow peas, herbs and shallots.
2. Combine rice vinegar, sugar, fish sauce, garlic and chilli in a jar and shake until sugar has dissolved.
3. Just before serving toss the dressing through the slaw ingredients and use as required.


::::::::::::::::::::::::::::::::::::::::::::::::::::::::::::::::::::::::::::::::::::::::::::::::::::::::::::::::::::::::::::::::::::::::::::::::::::::::::::::::::::::::::::::::::::::::::::::::::::::::::::::::::
12 hour roast Moroccan lamb and quince served with toasted Israeli couscous with pistachio and preserved lemon
Serves 4 – 6

• 1 large onion, roughly chopped
• 2 cloves garlic
• 2 teaspoons ground cinnamon
• 2 teaspoons ground cumin
• 2 teaspoons ground coriander
• 1 teaspoons ground ginger
• ½ teaspoon saffron threads
• ½ teaspoon ground black pepper
• 2 tablespoons olive oil
• 1 x 1.5 – 1.7 kg lamb shoulder
• 3 quinces, peeled, quartered and cored
• 1 tablespoon honey
• 1 quantity Toasted Israeli couscous with pistachios and preserved lemon

1. Combine the onion, garlic, cinnamon, cumin, coriander, ginger, saffron, pepper and olive oil in a processor and process to form a paste.
2. Rub the paste onto the lamb shoulder and place into a non-reactive bowl and marinate in the refrigerator for 12 – 24 hours.
3. Preheat the oven to 110°C (225°F). To bake the lamb, make a large bag out of baking paper and place the lamb shoulder and quinces into the bag in a baking dish. You could also place the lamb and quinces in an oven bag or simply cover the baking dish with foil. Bake for 12 hours.
4. Remove the lamb and quinces from the baking dish place onto a serving platter and spoon over any pan juices, drizzle over honey and serve with the Toasted Israeli couscous.


Toasted Israeli couscous with pistachios and preserved lemon
Serves 4 – 6

• ½ cup raw pistachios
• 40g butter
• 1 onion, finely diced
• 1 ½ cups Israeli couscous
• 2 ½ cups chicken stock
• 1 cinnamon stick
• 1 bay leaf
• ½ cup flat leaf parsley leaves, roughly chopped
• 2 tablespoons finely julienned preserved lemon

1. Toast pistachio nuts in a large saucepan over a medium heat until brown, remove from the pan and set aside.
2. Melt the butter in the saucepan and sauté the onion until golden, add the couscous, cinnamon and bay leaf, continue stirring until couscous has slightly browned.
3. Pour over the chicken stock and simmer until couscous is tender and the stock has been absorbed, season to taste.
4. Stir through the parsley, preserved lemon and pistachios. Use as required.

::::::::::::::::::::::::::::::::::::::::::::::::::::::::::::::::::::::::::::::::::::::::::::::::::::::::::::::::::::::::::::::::::::::::::::::::::::::::::::::::::::::::::::::::::::::::::::::::::::::::::::::::::
Rabbit and porcini ragout with papperdelle and fried sage leaves
Serves 4 – 6

• ¼ cup extra virgin olive oil
• 100g speck, finely diced
• ½ small leek, finely diced
• 1 small carrot, finely diced
• 1 small stick celery, finely diced
• 2 cloves garlic, crushed
• 1.2kg rabbit, cut in to 6 pieces  – ask your butcher to cut this for you
• 20g dried porcini mushrooms, soaked in ½ cup boiling water
• 1 large field mushroom, finely diced
• 1 x 400g can diced tomatoes
• 2 cups good quality chicken stock
• 6 sage leaves
• 1 bay leaf
• 1 stalk rosemary
• 500g fresh papperdelle pasta
• extra, 2 tablespoons extra virgin olive oil
• extra 18, sage leaves
• optional, ½ cup finely grated Parmesan cheese


1. Heat olive oil a large, heavy based, casserole dish over and a medium heat and sauté speck for 3-4 minutes. Add the leek, carrot and celery and sauté
for another 3-4 minutes. Add the garlic and cook for 2 minutes.
2. Move the leek, carrot and celery mixture to the sides of the pan and brown
the rabbit pieces well on all sides.
3. While the rabbit is browning, drain the porcini mushrooms, reserving the soaking water. Finely chop the porcini and once the rabbit is browned,
add with the soaking water to the casserole dish.  
4. Add the field mushroom, diced tomatoes, chicken stock, sage, bay leaf and rosemary.
Bring to the boil, reduce to a simmer and cook partially covered for 2 ½ - 3 hours, or until the meat is falling off the bones. Once cooked remove the rabbit pieces from the casserole dish and carefully pull the meat off the bone, shred into bite size pieces. Return the meat to the pan and season to taste.
5. Cook the pasta in a pot of boiling water til al dente.
6. While the pasta is cooking heat the extra olive oil in a small shallow pan over a medium heat. Fry the extra sage leaves until crispy and drain on paper towel.
7. Drain the pasta, reserving 1 cup of the cooking water. Toss ragout through the pasta, adding a little of the cooking water if needed to loosen the pasta. Serve topped with fried sage leaves and parmesan cheese to your liking.

food dept fact: You can substitute 6 chicken thighs on the bone in place of the rabbit pieces.


::::::::::::::::::::::::::::::::::::::::::::::::::::::::::::::::::::::::::::::::::::::::::::::::::::::::::::::::::::::::::::::::::::::::::::::::::::::::::::::::::::::::::::::::::::::::::::::::::::::::::::::::::
Slow roasted tomato and capsicum soup with sour dough croutons
Serves 4
Rich and bursting with flavour, this little red engine soup may take a little longer to cook than a regular soup, but don't be surprised if it is quickly slurped up!

• 1kg ripe tomatoes
• 2 red capsicum, halved and seeds removed
• 2 large red chilli, halved and seeded
• 2 red onions peeled and quartered
• 8 small cloves garlic, leave the skin on
• olive oil, for drizzling
• sea salt flakes and freshly ground black pepper
• 2-2 ½ cups good quality chicken stock
• extra, 1 tablespoon olive oil
• ½ sour dough loaf, crust removed and torn into 3cm crouton pieces
• olive oil and black pepper, for serving
• optional, 2 tablespoons finely grated parmesan cheese


1. Preheat oven to 160°C (325°F) Arrange the tomatoes, capsicum, chilli, onion, and garlic cloves in a baking dish, drizzle with olive oil and season to taste
with the salt and pepper.
2. Bake for 1½ hours or until the tomatoes and capsicum are charred and softened. 
3. Place into a large saucepan with the chicken stock and using a stick blender, blend until smooth. Bring to a slow boil over a medium heat, reduce heat and cover to keep warm.
4. Increase oven to 200°C (400°C). Place croutons and extra olive oil in a bowl and toss until the bread is coated in the oil.  Place onto a lined oven tray and bake for 10 minutes or until bread is golden and crispy.
5. Serve soup in a bowl, drizzle with olive oil, season with black pepper and serve topped
with sour dough croutons and parmesan if desired.


::::::::::::::::::::::::::::::::::::::::::::::::::::::::::::::::::::::::::::::::::::::::::::::::::::::::::::::::::::::::::::::::::::::::::::::::::::::::::::::::::::::::::::::::::::::::::::::::::::::::::::::::::

Crisp roast pork hock with spiced red cabbage and apple horseradish
Serves 4
This recipe from Jane Lawson is just so good we just had to include it in our slow story. Jane's beautiful cook book, Snowflakes and Schnapps, is a treasured favourite, not just because of the yummy recipes but the styling is divine too.

• 4 x 750g (1 lb 10 oz) fresh pork hocks from the hind legs, lightly scored around the hock
• 2 tablespoons sea salt
Spiced red cabbage
• 60g (2¼ oz) butter
• 1 red onion, finely sliced
• 1.5kg (3 lb 5 oz/about ½ large head) red cabbage, thickly shredded
• 65g (2½ oz/½ cup) dried cranberries
• 1 granny smith apple, peeled, cored and grated 6 juniper berries
• 60ml (2 fl oz/¼ cup) red wine
• 3 tablespoons red wine vinegar
• 1 bay leaf
• ½ teaspoon freshly grated nutmeg
• 3 tablespoons soft brown sugar
• ½ teaspoon ground allspice
Apple horseradish
• 65g (2½ oz/¼ cup) apple sauce

• 2 tablespoons bottled horseradish

1. Preheat the oven to 220°C (425°F/Gas 7). Place a large wire rack in a roasting tin. Stand the hocks upright on the rack, balancing them against each other with the small end pointing up. Rub well with sea salt. Cook for 1 hour, then reduce the temperature to 160°C (315°F/Gas 2–3). Pour a small amount of water under the rack and cook for 1 hour further.
2. Increase the temperature back to 220°C (425°F/Gas 7) and cook for a further 30 minutes, or until the pork is very tender, dark golden and crispy. Remove from the oven, cover, and rest for about 10 minutes before serving.
3. While the hocks are cooking, make the spiced red cabbage. Melt the butter in a large saucepan over medium-high heat. Add the onion and cabbage and stir for 10 minutes, or until the cabbage has wilted slightly. Add the rest of the ingredients, except the allspice, and stir to combine.
4. Cover, reduce the heat and simmer for 40 minutes, stirring occasionally, until the cabbage is tender and there is very little liquid left. Stir in the allspice and season to taste. turn off the heat and cover to keep warm.
5. For the apple horseradish, combine the apple sauce and horseradish and mix well. Set aside.
6. Serve the hocks on top of some cabbage with the apple horseradish sauce on the side.
tip: this dish is perfect with smooth mashed potatoes whipped together with a good dollop of mild, savoury mustard and some tender steamed green beans or spinach.


Dinosaur designs white platter Earth Art Range Medium Temple plate 
::::::::::::::::::::::::::::::::::::::::::::::::::::::::::::::::::::::::::::::::::::::::::::::::::::::::::::::::::::::::::::::::::::::::::::::::::::::::::::::::::::::::::::::::::::::::::::::::::::::::::::::::::
20 hour apple cake with spiced crème anglaise
Serves 6 - 8
10 hours in the oven and 10 hours resting definitely seems like an eternity but when the apple cake is baking all you have to do is relax and wait or maybe make some spiced crème anglaise to have with them. It’s definitely worth the wait!

• 6 granny smith apples
• 6 Fuji apples
• ¼ cup caster sugar
• 40g butter, melted
• 1 quantity Spiced crème anglais

1. Preheat oven to 110°C (175°F). Grease and line a 20cm (8 inch) cake pan.
2. Working with 1 apple at a time, peel and core the apples. Using a mandolin slice the apple on the thinnest setting.
3. Fan the apple slices over the base of the pan. When the base is completely covered with apple lightly brush with the melted butter and sprinkle over a little of the sugar. Repeat with remaining apples (alternating the types of apples), butter and sugar until all is used.
4. Cover with baking paper and then foil, seal tightly. Using a small knife puncture the foil and baking paper about 20 times. Place a smaller cake pan on top of the foil and fill with baking weights or dried beans. Take care not to cover all of the holes you just have punctured.
5. Place on a tray and bake for 10 hours. Remove from the oven and place onto a cooling rack, remove the pan with the pie weights and allow to cool to room temperature. Do not remove the baking paper and foil.
6. Once cool place the pan with the weights back onto the apples and rest in the refrigerator for a further 10 hours. Removes from the refrigerator, uncover and gently run a small paring knife around the edge of the tin. Turn the apples onto a serving platter and cut into wedges, serve with Spiced crème anglaise.

food dept fact: These apples make a delicious tart or pie filling or simply can be served over vanilla ice cream. You could also make in individual ramekins of the apple, cut back the cooking time to 2 – 3 hours.

Spiced crème anglaise
Makes 2½ cups

• 300ml cream
• 300ml milk
• 1 star anise
• 1 cinnamon quill
• 4 free range egg yolks
• ½ cup caster sugar

1. Place the cream, milk and spices in a saucepan, bring to a slow boil over a medium heat, remove from the heat and allow the spices to infuse into the milk for a couple of minites.
2. Combine the egg yolks and sugar in a bowl and whisk until light and fluffy. Gradually whisk approximately ½ of the spiced milk into the egg mixture.  Return the egg and milk mixture to the remaining milk in the saucepan and whisk well.
3. Place over a low heat and stir the custard until it has thickened and coats the back of a spoon. Do not allow to boil or it will curdle.
4. Once thickened cover the surface of the custard with plastic wrap to prevent a skin from forming and keep warm. Use as required.


A little about Jane's cook book
Snowflakes and Schnapps (Murdoch Books)
From the seaside towns of
 Scandinavia, to the alpine villages
 of Austria, from the ski fields of France, to the fairy-tale castles 
of Germany, and as far afield as the 
white-blanketed cities of Russia and beyond, comes this enticing collection of traditional recipes with contemporary flair. Beautifully designed, Snowflakes and Schnapps features recipes for everyday meals and special occasions, including a Christmas chapter, perfect for Christmas in July celebrations.
Celebrate the season of winter and enjoy this irresistible selection of simmering soups, hearty meals and indulgent desserts that will warm you to the core. from humble and satisfying classics to glamorous feasts worthy of a celebration, you are sure to be inspired by the mythical winter wonderland of Snowflakes and Schnapps.
Available in all good bookshops


the food dept would like to thank our lovely friends who kindly helped us on our slow shoot day
Food assistant: Nicola Mayes
Photography assistant: Lauren Chant

Friday, June 1, 2012

UNDERGROUND EXTRA – create colourful jars of pickled root vegetables with your left over vegies.

::::::::::::::::::::::::::::::::::::::::::::::::::::::::::::::::::::::::::::::::::::::::::::::::::::::::::::::::::::::::::::::::::::::::::::::::::::::::::::::::::::::::::::::::::::::::::::::::::::::::::::::::::::::::::::::::::::::::::::::::::
Pickled root vegetables
Makes a 6 litre jar or use a variety of smaller jars

• 1 bunch baby purple carrots
• 1 bunch baby yellow carrots
• 1 bunch baby turnips
• 1 bunch radishes
• 1 bunch baby beetroot
• 20 peppercorns
• 10 bay leaves
• 1 litre white vinegar
• 2 cups sugar
• 2 cups water
• 2 teaspoons vanilla salt or 2 teaspoons sea salt and 1 vanilla pod

1. Wash and trim the vegetables, pack into a 6 litre sterilized jar, alternating with the peppercorns and bay leaves.
2. Combine the vinegar, sugar, water and vanilla salt in a large saucepan. Heat over a medium heat until simmering and the sugar has dissolved.
3. Pour the hot vinegar over the vegetables and seal the jar. Allow to cool and then store in the refrigerator until required. Keeps refrigerated for 1 month.

food dept. fact: Thinly slice a selection of the pickles, toss with a handful of salad greens some thinly sliced red onion to make a refreshing and crunchy salad. They make great Christmas or birthday gifts for friends or family.

Thursday, May 24, 2012

UNDERGROUND – the food dept digs below the surface of the earth, uprooting, baby beets, parsnips, spuds and more. Have a peek at our recipes created with root vegetables.


::::::::::::::::::::::::::::::::::::::::::::::::::::::::::::::::::::::::::::::::::::::::::::::::::::::::::::::::::::::::::::::::::::::::::::::::::::::::::::::::::::::::::::::::::::::::::::::::::::::::::::::::::::::::::::::::::::::::::::::::::
Roast beetroot bruschetta with roast garlic aioli
Serves 4 – 6
Dive into the vibrant winter colours of purple and rich gold with these super baby beets. This makes a lovely light meal or snack.

3 bunches baby beetroot
2 bulbs garlic
1 tablespoon extra virgin olive oil
1 tablespoons red wine vinegar
½ bunch thyme sprigs
Sea salt and black pepper, to taste
½ cup walnuts
1 loaf sour dough
1 quantity, roast garlic aioli

1. Preheat oven to 190˚C (375˚F). Trim the beetroot, leaving a small amount of the stems attached. Halve any large beetroot so that they are all similar sizes. Place the beetroot and garlic in a roasting pan and drizzle over the oil and red wine vinegar. Sprinkle with the half the thyme sprigs and season with salt and pepper.
2. Roast in the oven for 40 – 50 minutes or until the beetroot are tender when tested with a skewer. Sprinkle over the walnuts and return to the oven for another 10 minutes, to roast the nuts.
3. Chargrill or toast slices of sourdough. Serve with the roasted beetroot, garlic and walnuts. Garnish with remaining thyme sprigs and a dollop of roast garlic aioli.

Roast garlic aioli
Makes 1½ cups
Turn your extra roast garlic cloves into a delicious roast garlic aioli. 

1. Place 6 cloves of the roasted garlic in to a motar and pestle. Add ½ teaspoon salt flakes and crush the garlic and salt into a paste. Add in one egg yolk, pound and stir until the egg, garlic and salt are well combined.
2. Gradually drizzle in 1 cup of light olive oil while continuing to stir with the pestle until all of the oil has been incorporated. Season to taste. 


Egyptian carrot salad with pita, almonds and olives
Serves 6 – 8
A beautiful salad to share with friends

• 3 bunches of baby carrots, use a selection of heirloom varieties
• 2 tablespoons dukah
• Sea salt and pepper, to taste
• 2 tablespoons extra virgin olive oil
• 2 big handfuls of baby rocket leaves
• ½ cup toasted almonds, sliced lengthways
• 1 cup kalamata olives
• 1 quantity Preserved Lemon Dressing
• 2 pieces toasted pita bread, broken into large shards (see below)

1. Preheat the oven to 200˚C (400˚F). Trim the carrots, leaving a small amount of the stems attached. There’s no need to peel the carrots when they are young. They roast beautifully with the skin on.  Cut any large ones in half lengthways, trying to make all the carrots roughly the one thickness.
2. Toss the carrots in a large bowl with the dukah, salt, pepper and olive oil. Massage into the carrots so that each carrot is well coated. Place into a large baking dish so the carrots are in a single layer and bake for approximately 30 – 35 minutes until the carrots are golden and tender.
3. Arrange the baby rocket leaves on a large platter and top with the roasted carrots. Sprinkle over the almonds and olives and just before serving drizzle with the dressing. Serve alongside the shards of crisp pita bread.

food dept fact: To toast the pita bread, separate the 2 layers of the bread into 2 discs and place onto a baking tray, drizzle with olive oil and sprinkle with sea salt. Bake in a hot oven, 200˚C (400˚F) for approximately 10 minutes until golden. Allow to cool and store in an airtight container for 2 weeks. Have these beautiful crisp breads on hand to serve with your favourite dip, yum.

Preserved lemon dressing
Makes 1 cup

• ½ cup extra virgin olive oil
• ½ cup freshly squeezed lemon juice,
• 1 tablespoon preserved lemon rind, pith removed and julienned
• 1 tablespoon honey
• Sea salt and black pepper, to taste

1. Combine all ingredients in a jar and shake well to combine, use as required.


Lemon roast chicken with parsnip puree
Serves 4
This succulent lemon chicken balances perfectly with the sweetness of the parsnip puree.
 It's a marriage made in heaven, and a great alternative to roast chicken and potato mash.

• 1 x 1.5 kg free range chicken
• 2 lemons, thinly sliced
• 2 cloves garlic, sliced
• 1 bunch lemon thyme
• Extra virgin olive oil
• Salt and black pepper, to taste
• 1 cup good quality chicken stock
• 1 quantity Parsnip puree

1. Preheat the oven to 200˚C (400˚F). Rinse the chicken and pat dry with paper towel. Fill the cavity of the chicken with the lemon slices, garlic and ½ bunch of thyme sprigs. Tie the chicken legs together to keep the lemon slices, garlic and thyme in place.
2. Place the chicken in a roasting pan and rub the skin with olive oil, season with salt and pepper. Sprinkle over remaining thyme sprigs and bake in the oven for 1 hour, or until the skin is golden and the juices run clear when tested. Remove the chicken from the oven and place onto a warm platter. Loosely cover with foil and leave to rest in a warm place until ready to serve.
3. Place the pan and pan juices over a medium heat, deglaze the pan with stock and reduce to a simmer. Simmer until glossy and syrupy, approximately ¼ cup.
Serve the chicken with the pan juices, parsnip puree and some steamed green beans.

Parsnip puree
Serves 4

• 750g Parsnips, approx 6 large, peeled
• 30g butter
• 1 small onion finely diced
• 1 clove garlic crushed
• 2 cups good quality chicken stock
• White pepper to taste

1. Cut the parsnips into quarters lengthways, removing the woody core, as it makes the puree stringy. Roughly chop the parsnip into chunks and set aside.
2. Heat butter in a large saucepan until bubbling, add the onion and garlic and sauté until onion is softened but not browned. Add the parsnip chunks and sauté for a further 5 minutes. Add the stock and bring to a boil, reduce the heat and simmer 15 minutes, remove the lid and simmer for a further 15 – 20 minutes or until most of the stock has evaporated.
3. Blend the parsnip with the remaining stock from the pot until smooth. If you would like the puree a little thinner adjust with a little extra stock or cream. Season to taste and serve hot.


::::::::::::::::::::::::::::::::::::::::::::::::::::::::::::::::::::::::::::::::::::::::::::::::::::::::::::::::::::::::::::::::::::::::::::::::::::::::::::::::::::::::::::::::::::::::::::::::::::::::::::::::::::::::::::::::::::::::::::::::::
Caramelized balsamic onion tarte tartin
Serves 4–6

• 1kg, approximately 12 small red onions, 5–6 cm in diameter
• 60g butter
• ¼ cup brown sugar
• 1 tablespoon thyme leaves
• Sea salt and black pepper, to taste
• 2 tablespoons good quality balsamic vinegar
• 1 sheet good quality butter puff pastry
• Extra, thyme sprigs for garnish

1. Preheat the oven to 200˚C (400˚F). Peel the onions and set aside. Place butter and brown sugar into a 20cm, ovenproof frying pan. Cook over a medium heat until the butter has melted and the sugar has dissolved. Sprinkle over the thyme leaves and season the pan with salt and pepper.
2. Place the onions root end down into the pan, packing them in tightly. Simmer over a low heat for 30 minutes and then carefully turn the onions over so that the top of the onion is down and continue to cook for a further 30 minutes or until onions are soft and caramelized. While still on the heat, pour over the balsamic vinegar and give the pan a swirl, continue to simmer for 1–2 minutes.
3. Cut a 24cm circle of pastry, don’t worry too much about the measurements just make sure that you cut the pastry with enough to be able to tuck in around the onions. The idea is, when the tart is cooked, you turn onto a plate and the pastry becomes the pie shell. You’ll need edges to catch all those delicious juices. When the onions are all tucked in, bake for 20 – 30 minutes or until the pastry is golden.
4. Turn the tarte tartin onto a serving plate and top with extra thyme sprigs.

food dept fact: This can easily be made into bite size tartes to serve as an appetizer with drinks.  Cook the onion as suggested above and then place them top end down into well greased small muffin pans. Spoon over any pan juices.  Cover with a circle of pastry, tucking in the edges and bake until pastry is golden and puffed. Turn out and garnish with thyme leaves.


::::::::::::::::::::::::::::::::::::::::::::::::::::::::::::::::::::::::::::::::::::::::::::::::::::::::::::::::::::::::::::::::::::::::::::::::::::::::::::::::::::::::::::::::::::::::::::::::::::::::::::::::::::::::::::::::::::::::::::::::::
Root vegetable chips
Serves 6–8
These chips make moorish little nibbles at your next drinks party or they are a yummy accompaniment to steak and salad.

• 250g sweet potato, peeled
• 250g beetroot, peeled
• 250g potatoes, peeled
• Vegetable oil for deep frying
• Sea salt flakes

1. Using a mandolin on the thinnest setting, slice the root vegetables and set aside. If using any vegetable that browns on standing immerse in cold water until ready to fry. Drain well and pat dry with paper towel as any moisture with cause the hot oil to splatter.
2. Heat the oil in a large pot to 190˚C (375˚F). A wok works well for deep frying. The large opening allows the food to move about in the oil and not stick together. To test that the oil is hot enough drop in a small cube of bread, it should instantly sizzle rise to the top and turn golden brown within seconds, otherwise dip the tip of a wooden spoon handle into the oil, if the oil is hot enough the handle will sizzle.
3. Working in batches of a handful at a time carefully drop the dry vegetable slices into the oil. Gently move them around so they don’t stick together and lift out when golden brown. Drain on paper towel and sprinkle liberally with sea salt while hot. The chips will crisp up as they cool. Once cold store in an airtight container – if you can resist eating them, then and there.

food dept fact: Any root vegetable can be used for this recipe. Carrots and parsnips can be cut into ribbons for frying with a vegetable peeler.


::::::::::::::::::::::::::::::::::::::::::::::::::::::::::::::::::::::::::::::::::::::::::::::::::::::::::::::::::::::::::::::::::::::::::::::::::::::::::::::::::::::::::::::::::::::::::::::::::::::::::::::::::::::::::::::::::::::::::::::::::
Best ever rosemary roast potatoes 
Serves 6
Gorgeously golden potatoes from the gods, salty crunchy spuds. there are so many varieties of beautiful potatoes that are great to roast, look for the starchy varieties rather than the waxy ones. We love the good old fashioned brushed (Sebago) potatoes.

• 1kg Sebago potatoes, peeled
• 2 tablespoons olive oil
• 2 tablespoons rosemary leaves
• Sea salt flakes
 

1. Preheat oven to 200˚C (400˚F).   
2. Cut the potatoes into quarters, approximately 5cm pieces. Place into the large pot of cold water and bring to the boil. Once boiling reduce to a simmer and cook for 15 minutes or until the potatoes are just tender. 
3. Drain well until potatoes are dry and return the potatoes to the pot, give them a good shake in the pan to roughen up the edges. This helps to get a beautiful crispy outside.  
4. Place the oil into a heavy baking dish and heat in to oven for 5 minutes. Add the potatoes and carefully move around the pan to coat in the oil. Sprinkle over the rosemary leaves. 
Place into the oven and bake for 30 minutes. Turn the potatoes over and continue to roast for a further 30 minutes until golden brown and beautifully crisp. 
5. Remove from oven and while hot sprinkle with salt. Serve immediately.


:::::::::::::::::::::::::::::::::::::::::::::::::::::::::::::::::::::::::::::::::::::::::::::::::::::::::::::::::::::::::::::::::::::::::::::::::::::::::::::::::::::::::::::::::::::::::::::::::::::::::::::::::::::::::::::::::::::::::::::::::: 
Kumera pie
Serves 8
This is the food dept's Australian answer to the tradtional American pumpkin pie. So try kumera instead of pumpkin, for a little aussie twist on Independence day.

• 700g kumera
• 1 quantity sable pastry
• 1 cup brown sugar
• 3 eggs
• 1 ½ cups cream
• ½ teaspoon salt
• 1 teaspoon ground ginger
• 1 teaspoon ground cinnamon
• ½ teaspoon ground nutmeg
• extra, 1 tablespoon brown sugar
• Double cream, for serving
• Maple syrup, for serving

1. Preheat oven to 180˚C (360˚F). Cut the unpeeled kumera in half lengthways. Wrap each half in foil and bake for 1 hour or until tender. Remove from the oven and when cool enough to handle, scoop out the flesh and discard the skin. Measure 2, firmly packed cups of kumera puree and set aside.
2. Roll out pastry between 2 sheets of baking paper. Line a 23cm (9inch) pie plate with pastry and pinch the edge to make a decorative rim on the pie. Chill for 1 hour. Reserve the remaining pastry. Line the pastry shell with baking paper and fill with pie weights, rice or dried beans. Bake blind for 10 minutes. Remove from the oven and set aside, increase the oven to 200˚C (400˚F).
3. Combine the kumera, brown sugar, eggs, cream, salt and spices in the bowl of a large food processor. Process to combine, set aside.
4. Roll out the remaining pastry and using a maple leaf cutter and or a small knife cut out a variety of different size maple leaf biscuit shapes. Place on a lined baking tray, mark in the veins of the leaves and sprinkle with extra brown sugar. Bake for 10 minutes or until brown.
5. Remove the pie weights from the pastry shell, pour in the kumera mixture and bake in the hot oven for 10 minutes. Reduce the oven to 180˚C (360˚F) and continue baking for 30 – 40 minutes or until the sweet potato custard sets. Cool and serve with double cream, maple syrup and maple leaf biscuits.


Sable pastry
Makes enough pastry for a 23cm (9inch) pie and decorative leaves.

• 250g  butter, softened
• 125g caster sugar
• 3 egg yolks
• 350g flour

1. Place the butter and sugar in the bowl of a food processor and process until creamy.
2. Add the yolks one at a time through the feeding tube of the processor. Add the flour and pulse the mixture until it comes together to form a dough.
3. Remove from the processor and flatten into a disc, wrap in plastic and refrigerate for several hours or overnight.
4. Bring pastry back to room temperature and give it a very gentle knead. Line the pie plate and refrigerate again for 1 hour or until ready to bake.


Thanks to Lauren Chant our photography assistant for helping us on the day of this shoot.